Pages

Saturday, February 26, 2011

Kiwi Kraze

HyVee had Kiwis on sale this week for $.25 each.  Daniel and I LOVE kiwi, so I bought a bunch.  A few weeks ago during "Kansas School Lunch Week" (what?), our cafeteria had kiwi that was quartered, skin still intact.  To my disgust and disappointment, most of the kiddos took them but threw them away without trying them.  I hate wasting food, especially fresh fruits and veggies.
One of my sewing students was eating hers (which made me super happy!) and I went to sit and chat with her (I monitor lunch for 2 periods).  I asked her if she liked them and she popped one in her mouth with the skin still on.
I said, "Uh, you do know you're supposed to peel that off, right?"  She told me her mom makes her eat the skin because of the extra nutrients.  Hmmmmm.. skeptical.  I ate lunch a few minutes later and secretly tried it.  SO GOOD!  I hate peeling kiwi because they get slimy and I peel away half of the flesh when I'm in a hurry.  Now, no more!  I looked into it, and one site said that eating the skin triples your fiber intake.  I'm sure it's rich in fiber, but don't quote me on that number.  Anyway, try it!

Daniel and I ran some errands today and stopped by Hobby Lobby and Mardels.  We are starting a new devotional together- Experiencing the Words of Jesus: Trusting His Voice, Hearing His Heart by Max Lucado and are super excited.  I'll let you know how it goes!

I've decided to branch out from my typical neutral color scheme and add green accents to our room.  I planned on sewing some pillows today, but that didn't happen.  Hobby Lobby did provide me with some cute flowers, though!


 I love magnolias!  Daniel's mom gave me this cute hanging vase for my birthday a few years ago.  The glass had gotten lost in our {several} moves, but I found it recently.  Yes!  Eventually I'd like to have 2 or 3 tiered candle holders on the right of the dresser, but I have to find ones I like first =)

This week I also found a blog with a tutorial for a super cute picture frame turned earring holder.  I forgot to bookmark it, so of course I can't find it now.  Oh well!  Here's what I did and what you need:


Supplies:
  • Picture Frame (glass not needed)
  • Burlap, enough to cover the area of the frame
  • Tape
  • Earrings


Here is my hot mess of a jewelry Box:
GOBS of clearance jewelry from Charming Charlie's in Lees Summit.  $1!


 Needed to organize that mess!  Here is the frame I used BEFORE.  This used to me in my room in high school, was then in my little sister's apartment when she was at KU, then came back to me.  Still has some old boyfriend pics of hers!  Woops!


I am usually pretty exclusive to Joann's because of their teacher discount and coupons, but like I said, we were already at Hobby Lobby.  
1/2 Yard of Burlap at $3.99 per yard means this project cost me $2!
Turn the frame over, take out the glass, and lay burlap inside.  I have seen tutorials where you can glue the burlap in place now, but I didn't have anywhere else to put the glass, sooo I put it back in the frame on top of the burlap and pulled it tight.  I also did not glue.


Place everything else back on top of the glass and close the frame in the back.  I trimmed the burlap and then taped it down (ghetto fab!) so it would lay flat against the wall.
Why you so obsessed with me?  He NEVER leaves me alone when I do my projects!

Now, hang on the wall and add earrings!


I must have a runaway earring missing somewhere.  Bummer!

 That's my Saturday stunt!  Hopefully, pillows tomorrow.  =)
 

Thursday, February 24, 2011

The Waiting Room and Framed Mirrors

I have been so enthralled with thrift stores and Craigslist purchases lately that I've stocked up on, well, STOCK, for some DIY projects.  I have committed myself to a "no-more-spending spree" until I finish up what I have.
I adore what I do for a day job (teach middle school sewing- AMAZING gig!  Who knew you could get paid to have fun all day?), but I honestly cannot wait to get home to work on my "babies".  Here's my lineup:
  • Refinish/recover padding on a chair for the master bedroom
  • Refinish Craigslist coffee table (GORG) for the basement
  • Make/cover pillows for the bedroom, decorative chair, and living room couches
  • Refinish sewing desk and computer desk
  • "Frame" bathroom (master and hall) mirrors {read below!}
The sewing desk was FREE (JOY!)- I saw it on the curb the other night waiting for trash day and rang the doorbell to ask if I could have it to refinish.  My sister-in-law came with me to aid in the loading process, so while she was in the car and I was "asking", I was making a new friend and scoring 2 free kitchen tables with chairs!  The woman tried to refinish one of the chairs and hated it, so they were just going to throw it in the dump.

Score!  I am my father's daughter.  He has been known to dumpster drive on many occasions.  I have no shame- one man's trash is definitely MY treasure.

Now, after all of my deal seeking adventures, I have a waiting room of junky looking furniture that will soon look like a thousand bucks =) 

Here is a mass before picture of my "rags":


I mentioned in the list that I want to "Frame" our bathroom mirrors.  I was at my parents' house over Christmas and LOVED that way it looked on their mirrors.  I wanted to do it then and today I stumbled upon a blog- Show & Tell - that has a tutorial!  So exciting.  Here is a rundown of the framing process- these are the pictures she used in her tutorial.  I "summarized" it through pictures and caption for easy reading:


I LOVE this- even contemplating painting the cabinets and light fixture black during my extended time off (eh, hmm, Spring break and summer)!

Happy Projecting!

Tuesday, February 22, 2011

Thrify Five-Fifty

I usually stick to furniture and home goods when shopping through thrift stores- nothing against any of the other merchandise, I just don't have the patience to weed through the clothing.  PLUS, depending on the store, I find better deals on NEW clothes than on used.


Anyway, I had to stop by Missouri Sewing Machine in Overland Park today to get some bobbin cases fixed for school.  After waiting around for 30 minutes for some little hunched-over man in the back room to screw in some nuts and bolts, I realized I wasn't far from a pretty decent thrift- Turn Styles.  Here is the link to their website.

I didn't find any good furniture (except a $5 dresser, which could have been painted, but it had zero character), so I decided to look through some of the clothing.  After all, all clothing was an additional 50% off.

Ew?  No way!  It's called a washing machine.  I'm sorry, but I'm pretty sure a large majority of clothing at retail stores are tried on 1000 times OR have been returned.  Used is Used.


Low and behold, I found a GREAT knee-length pea coat in my favorite color (taupe!) and in fabulous condition.  I was weary about it being a size too small, but it fit! 

 Please excuse the blurriness of this picture.  My wonderful
husband has very limited photography skills!


Originally $10, I got it for $5, $5.50 with tax.  Can't beat that!

Monday, February 21, 2011

Ode to Dino

My sis-in-law got me this for my birthday!  Love it.

My. Husband. Is. Awesome.

"Ode to Dino?  I am confused!"  When Daniel and I got married and were going through our premarital counseling at church, our Pastor (NOT his Dad =D) apparently thought I was calling Daniel "Dino" in conversation.  I think I was just talking too fast and rambling, which happens often, but we never could tell him the truth.  Oh well!  Now I call him "Dino" often, so much that we don't even associate it with that time in our life.  Too funny!

Anyway- my husband.  What a great guy! Not only does he work hard to provide for us, but he comes home everyday with this smile on his face that says, "I've been waiting all day to see you"- well, at least that's what he makes me think.  Whether or not it's true doesn't really matter (and I'm sure it's not always true.  I'm a brat sometimes).  What matters is that he goes out of his way to make me feel loved.  As a wife, I pray I honor him as much as he loves me.  Tall order, but it's a work in progress.

I'm going to be a total stereotypical midwesterner and tell you he reminds me of a country song.  Yes, I did just say that.  I sometimes listen to CMT when I get ready for school in the morning and "Mama's Song" by Carrie Underwood always makes me think of him.  And my mom.  But mostly him.  Look it up.  Loving and being loved by Daniel has changed my life.  Love him so!

Okay, ENOUGH.  I thought this blog was about sewing and being creative.  On the subject of Daniel, he totally shocked me for my birthday and bought me a new laptop!  All I did for his birthday was give him giftcards and "permission" to buy a huge tool chest, as if he needed my permission in the first place.  I don't deserve it, but knowing I enjoy it makes him happy, so I might as well =)

I thought,"I need a case to take care of my new 'puter!"  All of the cases I see out and about are UGLY, so I made my own.  You can find the tutorial I used here!


My supplies- the measurements are in the Tutorial.  From start to finish- $7!

This ruffle was a little bit of a pain, but worth it.
Tada!  Sew cute!  Link to the flower tutorial is on the tutorial where I got this pattern.  They were SO easy!


Lined and all, perfect fit!


The only thing I will say is that after 5 hours of sewing, I STILL HATE lining ANYTHING, especially if it involves a zipper.  Also, sometimes high-tech computerized sewing machines just don't hold a candle to the basics.  Oh well, they turned out great.  Please notice that I chose fabric that is 1. patterned and 2. colored.  Many people make fun of the lack of color in my house and wardrobe, so this one's for you.
My sister in law has a mini-me laptop, so she got a mini-me case, too! 

Kaleigh's mini-me case.  =)

When I was done with my adventure (again, 5 hours), I realized I had neglected my puppy and he had peed on the carpet- BAD BOY!  This is where I found him after:

Poor baby!
All in all, great President's Day off.  Thankful to be an American!

My First Tutorial

I wrote yesterday about how much I LOVE online sewing tutorials- so here is the product of my first!
Daniel and I aren't quite ready for our own babies yet (soon, though!), so I tend to live vicariously through my friends who are having theirs... by sewing them things.

A friend of mine from college who was in my freshman bible study just had her beautiful baby girl and I thought, AWE I should make her something. SO here it is:

Binkie Clips!  I love them!  They were SO SO SO easy to make and cheap, too.

Fabric:  $.50 (for all three!)
Thread:  Already had it
Ribbon:  $1.25
Clip:  $1.25 each (they are mitten clips and I'm sure you can find them even cheaper online- that's not even with a JoAnn's coupon)
Total:   $5.50 for all three

To see the tutorial I used, click here!

They were folded in a mailing envelope- they DO lay flat, I promise!

LOVED this onesie!  Did NOT make it- Target!

Ribbon on the back.


The only thing I changed about the tutorial is that I didn't just fold over the strap through the clip and sew it down, trusting that the fray check would hold up.  I thought it looked unfinished, so I folded the end over several times and then sewed it down.  Once you read the tutorial, I think you'll understand.

Enjoy Tara and Baby Claira!

Sunday, February 20, 2011

Rags to Stitches

I am re-starting my blog... again... because of all my house projects.  To celebrate the occasion, I renamed my blog and gave it a face lift (If only it was this fast and easy in real life, eh?).

My husband and I just bought a house at the end of 2010 and I am clearly preoccupied with decorating it.  My rules?

Cheap.
Chic.
Hand-made.
Repurposed.

I absolutely adore finding furniture pieces at thrift stores and on Craigslist and refinishing them to be my own.  I also love love LOVE to put my sewing skills to use to make our house a home.

Sewing patterns from the fabric store are great, but I love following design and DIY blogs and using tutorials.  They are easy to follow, usually have REAL step by step pictures, and, best of all, are FREE FREE FREE.  If  I make something with a tutorial, I will share the link!

Tomorrow I have a LOOONG date with my sewing machine.  On the menu?  Laptop case for my new 'puter (thanks to my handsome hubs) and pillows galore for the living room and bedroom.  I will upload in the evening!

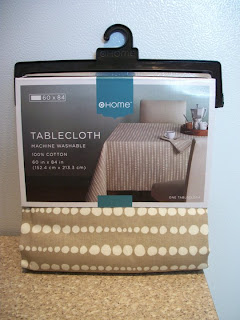
Until then, here are my recent projects:  Re-purposed table cloths (read:  table runner and decorative towels, tutorial from a FREE library book) and shower curtains (re-usable shopping totes).


More tomorrow!