
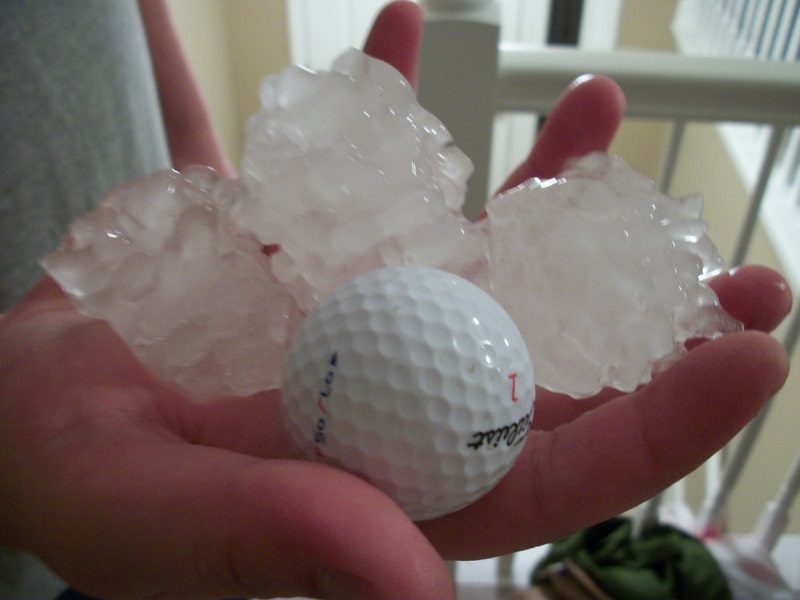
Sunday it was sooooooooo nice outside! {Little did we know we'd get pelted with golfball sized hail at 9:30 that night!}
Daniel and I moved in to our house in December, so yesterday was the very first time we were able to spend the afternoon outside doing yard work. I reminded me of my parents and how they used to do the same on the weekends in the Spring and Summer. It made me feel so grown up! Daniel pruned our rose bushes (he is a landscaping wizzzzz!) and showed me how some of our bulbs (he's teaching me the lingo!) were starting to sprout and flower. Hot Dang!
 |
| Oscar loved being outside with us! So sunny- he couldn't see! |
 |
| Wow! Exciting. |
Here are some before shots:

I also spray painted a soap pump. Say Whaaaaaaa? The coolest thing ever- I saw the tutorial on House of Hepworths (the gal that writes this blog is hilarious- her blog is linked on my home page!).
The original tutorial shows you to buy plastic spray paint and then you can {optional} paint over that with any other spray paint, which she did. I didn't want to pay for two cans of paint, so I took a gamble on this:

Here is what you need:
- Soap Pump (I looove the foaming ones), preferably without a logo embossed into the plastic
- Rust-oleum textured spray paint
- Cardboard and items to prop pump up on
- Cup/bowl for soap
- Embellishment- vinyl letters, buttons, whatever you fancy!
Here is what you do:
- Peel labels off of the soap pump. Use Goo Gone to remove any access label goo. I bought Up & Up from Target because 1. I had a coupon, so it was $1, 2. The bottle isn't embossed with their logo like Dial soap pumps are.

- Pour the soap into a container that will allow you to easily pour it back in- I used a liquid measuring cup with a spout.
- Assemble spray paint "stage" and prop bottle upside down, pump right side up. I used a sprinkles bottle to prop up my soap bottle and a tums bottle for the pump.

- Spray away! I did 3 light coats =) I also hadn't used the pump yet, so it was still in the down "off" position. It came up when I was done without a problem. I don't know if it would make a different if you sprayed it in the up position- the paint might clog it up- who knows! Also, make sure to spray the bottom of the soap bottle and lightly inside of the pump mouth!
- Once it is dried, apply your applique. I glued on this cute button!
- Voila! Easy makeover!

To.Die.For!
If you like what you see, become a follower!
I painted my Dawn foam bottle, mine turned out great. I chose oil rubbed bronze in Rustoleum.
ReplyDelete