Showing posts with label Tutorials. Show all posts

Monday, March 26, 2012

Artisan Bread Series: Equipment and Ingredient Needs


Welcome to the first post in the Artisan Bread Series.  This post will give you some up-front information about what equipment you will need to buy (if any) for most of the recipes, as well as some basic ingredients that are used in most of the recipes.  You can use any brand of the supplies and ingredients that you like- I will share what I was able to find in the Midwest and where I purchased it.


Equipment

  1. Oven Thermometer.  The book recommends that you purchase an oven thermometer to calibrate the oven and ensure it is baking at the correct temperature.  My oven is only a few years old and I have never had a problem with it under-baking or over-baking according to recipe times, so I skipped this step.  If you do suspect something going wrong in your oven, these thermometers are inexpensive and can usually be found anywhere kitchen furnishings are sold. 
  2. Baking Stone.  This is one thing you cannot go without.  The baking stone in these recipes will ensure your bread loaves are nice and crisp on the outside (especially on the bottom) without falling soggy.  Stones are porous and will absorb any extra moisture in your dough while baking.  These doughs are considered highly "wet" doughs, so this is important.  It will also ensure even heating throughout the oven.  These stones can range anywhere from $15 to $50.  I purchased the Bialetti 3-Piece Pizza Stone from Target for only $14.99, and it even came with an extra pizza cutter (something we can always use!) and a metal rack to set it on.  It works fantastic- I have zero complaints. In fact, I couldn't be happier with it.  Please read the manufacturers instructions on washing before using.  Like I said, the stone is porous, so it will take on detergents and soaps. 
  3. Large Tupperware/Container.  You will need a large container that can hold your risen dough in the refrigerator.  I like to use my KitchenAid Mixer to mix my dough, but I put it into a large, shallow tupperware to rise and store (I'm a little weird about my kitchen being "put together".  Can't be without my mixing bowl for a whole week or two!).  It will need to covered, but not airtight.  I place plastic wrap over mine and call it a day.
  4. Boiler Tray or Metal Pan.  This pan needs to be placed in the oven (along with the stone) during oven preheating.  Place it on the rack below the stone.  When putting in your dough to be baked, you will need to pour a few cups of warm water into the metal pan (glass will shatter, which my friend Jenni and I learned the hard way! duh!), which will create steam in the oven.  This will make your bread nice and crusty, giving it a nice, caramelized crust.
  5. Serrated Bread Knife.  When cutting your bread, that last thing you want to do is destroy your pretty creation.  A bread knife will cut (in a sawing motion) through the crust and crumb (inside) without compressing.
  6. Measuring Tools.  Obviously.  Cups and Spoons.  Some of the recipes call for 1/2 tablespoons, which are hard to find in spoon form.  Just remember that there are 3 teaspoons per tablespoons, so 1/2 tablespoon would be 1.5 teaspoons.
Some of the specialty breads (particularly dessert breads) require a special mold, but many of them are just loaf pans for fluted pans, which many bakers, such as myself, already have.


Ingredients
 These are the standard ingredients for many of the recipes.  If a recipe calls for anything else, I will explain it more in that particular post!
  1. White, All Purpose Flour.  Everyone has it.  Don't try and substitute or change the proportions of white flour in the recipes because the gluten content will be thrown off, not to mention the crispiness of your crust.  The book says to only use non-bleached flour because of unnecessary chemicals and loss of protein, but I used bleached in a bind and the bread turned out great.  Use what you like.  If you substitute bread flour, the bread will be extra chewy and you will have to decrease the amount of flour.  Don't use it, don't care.
  2. 100% Whole Wheat Flour.  Whole wheat flour is, clearly, the whole grain kernel.  It contains the germ and bran, which is removed to make white flour.  It's taste is nutty and provides fiber.  The germ has natural oils that prevent a crackling crust, so some of the recipes use only 1/2 cup.  The book does include (and I will bake them) a few recipes that are whole-wheat breads, but they have a soft crust.  I use Hudson Cream Whole Wheat Flour, which is $2.60 for 5lbs at our local grocer.
  3. Rye Flour.  Don't fear if you're thinking, "Uh, but I hate Rye Bread!".  You need it, trust me.  You will only use 1/2 cup in some of the recipes, too.  I use Hodgson Mill Stone-ground Whole Grain Rye, which was $3.50 at Walmart and $6.50 at the local grocer.  Uh, I will be going to Walmart!
  4. Corn Meal.  I found several brands (even store brand) for less than $1.50.  If you let your dough rise and bake on the corn meal, it will transfer to and fro more easily.
  5. Yeast.  You can find yeast anywhere.  I use the regular (not instant) yeast from Fleischmann's.  You can buy envelopes or a jar, but I prefer the jar.  It is cheaper and easier to measure.  After opening, keep the jar in the refrigerator.  I found this 4 oz. jar at Target for about $3.50.
  6. Water.  Use whatever water you drink at home- tap or filtered.  It needs to be lukewarm, around 100 degrees Fahrenheit. 
  7. Salt.  The recipes call for Kosher Salt, which is coarser than table salt.  I've substituted sea salt and it worked perfectly.  If you are using finer table salt, decrease the volume in the recipe by one-quarter.
 Wednesday, we will talk about various tips and techniques.  Happy shopping (or gathering)!

Saturday, March 17, 2012

Garden Party

Last Spring was the first we had in our new house and, although I really wanted to have a garden, we decided not to.  We had some other landscaping to do and pay for, so we thought it best to wait a year.  I thought that year would never come, but it's finally here!

A few weeks ago we picked out some seeds.  We are planting:
  • Tomatoes
  • Cherry Tomatoes
  • Jalapenos
  • Bell Peppers (the "surprise" packet with purple, red, orange, yellow, green, and white ones.  Who knows what will sprout!)
  •  Cantaloupe (Daniel's idea.  He is obsessed)
  • Green beans
  • Cucumber
  • Radishes
  • Sweet Basil
  • Parsley
  • Cilantro
  • Oregano
  • Blueberries and blackberries (Technically bushes.  We won't actually see their fruit until next year =(  Oh well!)
Today, we went and bought a seedling kit, soil, vegetable and fruit "food", and a watering can.  We started our seeds in the kit and will be growing them inside until we are safe from a hard frost, the seeds germinate, and are ready to be planted in the ground.  I will write about that when the time comes!
Here are all of our supplies:

Here is what we did:
 First, we used a silver sharpie to label each "group" of cells so we know what plant it is.  Then we filled each cell with soil without packing:
 Then, we put one seed in each cell.  Some of the seeds were tiny, some were huge!  We poked them down with our fingers until the seed was about half way down the cell.
Cover it back up with more soil.
We did the same thing with herbs, but we planted them in little pots and will keep them by the window in the kitchen.  We planted several herb seeds in each pot because the pots were so big.  Once done, water until you see it just leaking from the bottom (if using a pot with a tray) or until the soil is thoroughly damp:
The package claims that if you put the plastic "lid" back on the cells, it creates a greenhouse effect.  Hmm.  We will see! We have no great spot for sunlight in the house, so we are being hoosiers and keeping them on TV trays by our back door.  I'm sure company will think we are growing pot.

Can't wait to update you once our babies start to grow.. and share recipes using them!  So much of our grocery bill is fresh produce.  We will still have to buy some, but this will save us a lot of money!
Once we have kids, I think we will add more variety like carrots and peas and make our own baby food out of our own garden.  That and cloth diapers?  We are turning into total hippies.

Next week I will be starting a bread series, baking and reviewing several recipes.  The base for this bread is so easy and the dough can be stored in the refrigerator for 2 weeks before baking.  No kneading.  You will love it!

Thursday, March 15, 2012

DIY Chicken Stock


We like chicken.
A lot.
Our dinners usually consist of either roasts, 93/7 ground beef or chicken breast.  Seems pretty boring, but we actually get pretty creative.
Every once in a while, I will buy whole chickens when they are on super sale and roast them.  Sometimes we eat just roasted chicken, sometimes we "harvest" the meat, pull it, and freeze it for easy dinners later (quesadillas?  Enchiladas?  Soups?).  I used to throw the bones away, but I started making my own chicken stock and can't believe I haven't done it before.  It is SO easy and I trick myself into thinking it's free because we really bought the chicken for its meat.  Like it even more.
Here is how.

First, prepare and cook your bird (i.e. rinse and take out insides.  I suppose you could use the insides for your stock, but I think they are geeee-ross).  You can roast it, or you can cook it in a crockpot all day with any yummy seasoning you like.  I usually dump garlic, onion powder, parsley, lemon pepper, salt, normal pepper, paprika, and anything else I see in my spice cab.  If you cook it in a crockpot, fill the bottom of the pot with 2 inches of water before cooking.  Cook on low for 12+ hours.


Second, take off the meat.  Eat it or freeze it.  Save all the skin, bones, and etc.  Leave the extra juices in the crock pot.

Put the bones and etc. back into the crock pot.  Add:
  • 4 peeled and quartered whole carrots
  • 1 onion, peeled and quartered
  • 4 quartered stock celery
  • GARLIC (i used like 5 tbps of pre-minced.  Don't judge)
  • 2 tbsp dried parsley
  • 2 Bay Leaves
Pour enough water to fill it to the top.  Cook on low 12 hours.  I did this overnight.  Nothing like waking up to fresh brewed chicken stock.

Pour through a sieve into a separate bowl.  Toss all of the "bits".  You should be left with pure stock!

Chill in the fridge and skim off the fat from the top once it's hardened (the fat, not the stock).
I freeze them in ice cube trays or separate freezer bags so that I can use different parts at different times without waste.

And there you go.  DIY stock.  We ended up making some killer chicken tortilla soup.  If only everything else in life were so easy.
Skip To My Lou

Tuesday, December 6, 2011

{Knee Warmer Tutorial}

I love boots.
I wear my one brown pair that I got from Old Navy the year before last for $4.50 at least 3 times a week.
I know.  I need more.

I saw these photos on Pinterest and fell. in. love:

Looove the sock thing.
Problem- my boots are rather snug.  I don't think I can fit socks over leggings in there.  So, I decided to make some faux socks out of old sweaters, a.k.a "Knee Warmers".

Here is how:

First, grab an old sweater.  We are going to take advantage of those already-sewn side seams and finished edges.  It's practically impossible to "hem" cable knit. 

I already cut off the sleeves and neck
Measure your knee area and subtract a few inches- the sweater material is going to stretch.  My legs/knees were about 13 inches, so I cut my warmers to be 10 inches in width (5 shown in the picture because the sweater is folded in half).  Cut two total, one out of each side edge of the sweater:


In order to have nice, finished edges on the inside of your warmers, we are going to sew french seams.
Don't freak out.  They are super easy.  With wrong sides together (I know, that seems wrong- it's not), sew a 1/4in seam down the side (I serged it).

Flip them inside out and, along that same side, sew a 3/8 in (or larger) seam.  This will "encase" that previous seam.

Flip right side out again.  Tada! 

Now, all we need to do is finished that bottom edge we cut (the other edge should have been the already-finished edge of the sweater).  I serged them (and used tan thread so you can see), but you can zig zag them.


Sweet!  Put them on right before boots, leave the zig zagged edge down in your boot, like this:

I look like I have the chubbiest legs ever!  Hmmm... need to work harder on that!

Loooooove it, even though it looks totally homeless under neath.  Haha.

Saturday, December 3, 2011

How to Wash Uggs

My feet reek.

I know, gracious.

When I was in elementary school and middle school, my friends and I played club soccer (indoor and outdoor... I started out atrocious.  At our first tryouts we were a "package deal" according to the mom of one of my friends.  Thankfully, one of my friends was so awesome, they just took us all.  I was the chubby defender.  Baha.  I got better {and lost some weight} over time).  At sleepovers, the "triple dog dare" during truth or dare was to smell my Adidas Sambas for 10 seconds.
Did you have these?  What tom boy girl didn't, can I get an amen?! Ha.

Ruuuuuuuuuuuuuuuuude.

=)  I thought it was funny, no hard feelings.  Nonetheless, we're talking serious stench.

My sister bought some Ugg boots a few years ago and they stretched out so much they don't fit her anymore and now fit moi.  They must have stretched a ton because she wears size 5 shoes (I don't know how the girl stands upright.  She has webbed toes, too.  Hahah!  Something that pretty has to have something weird!) and I wear size 8.  I wear them a lot- but they are starting to fume.  I can smell them now as I type- and they are on my feet!

I was weary of washing them- I know they are made with real wool and I see signs in dry cleaning establishments that they clean Uggs, telling me to proceed with caution.

Craaaaaap. 
1.  I refuse to pay someone to wash my clothing.  Ridic.
2.  How am I going to do this without ruining them!?

I googled it and found answers.  Here is what I did:


First, Soak with a mild detergent suitable for wool (Duh.  Woolite!) in the tub with lukewarm water.  Scrub any really dirty spots with an old tooth brush.


Rinse with cold water.  Try and gently squeeze any excess water out that you can.  (p.s. want to wash clothes like this?  Check it out!)

Place boots in the washing machine.  Do not add soap!  Start your machine on the spin cycle (thankfully I have an obsolete washing machine that allows me to just turn the dial.  Agh, some day high efficiency will come my way!).  Remove boots when spin cycle is complete.

Let boots dry indoors or out- just not in direct sunlight.  I heard they may be tight the first time you wear them again, but they will quickly stretch back out.
FYI- got that drying rack when we moved into our new church- left for dead by the previous church.  mine!  Love it.  Would also work fantastic at a garage sale.  Hmmmm...
 Uggs are now smellin' fresh and clean!  =)

Thursday, November 17, 2011

Glamyards

A few weeks ago we had an in-service with the other middle school teachers in the district and we always share fun ideas to use in the classroom (I brought felt blooms =D).  Some of the teachers have been making lanyards with their kiddos and it has been a total hit.
Despite the fact that we give students 3 days off for Thanksgiving, they feel the need to skip town early and either come only Monday, or not at all.  I don't blame them-I would probably do the same if I could.  This=stress.  I can't just give them homework to do while they are gone so they don't fall behind (if only sewing machines were invisible- or we could sew with our minds.  Oh well, maybe in heaven.) because, well, we. sew.  It's such a hardship to have to reteach them 3 days worth of sewing patterns when they get back, because they are only falling behind even more.  We should be starting pattern envelopes on Monday, but I'm going to be smart and postpone until after Thanksgiving.  Instead?  Those awesome lanyards!
I found myself praying for my students last week when I had to leave school early unexpectedly.  I was in Walmart and, for some reason, I was overcome with gratitude and love for my girls.  They are so sweet, so kind, so fun.  They like to talk to me as much as I like to talk to them (which is a lot!) and share so much of their lives with me (they even asked me to wear my hair straight for "crazy hair day" this week and fawned over it when they saw it.  It was so sweet).  I am truly sad that my semester with them is coming to a close, but thankful that I have recruited most of them to take my Sewing II class next semester so that I get a whole year of them. 
While at Walmart, I found some faux sequin fabric ("fequin") for $1.47/yard.
Yep, ya heard right.  Best Cheap.
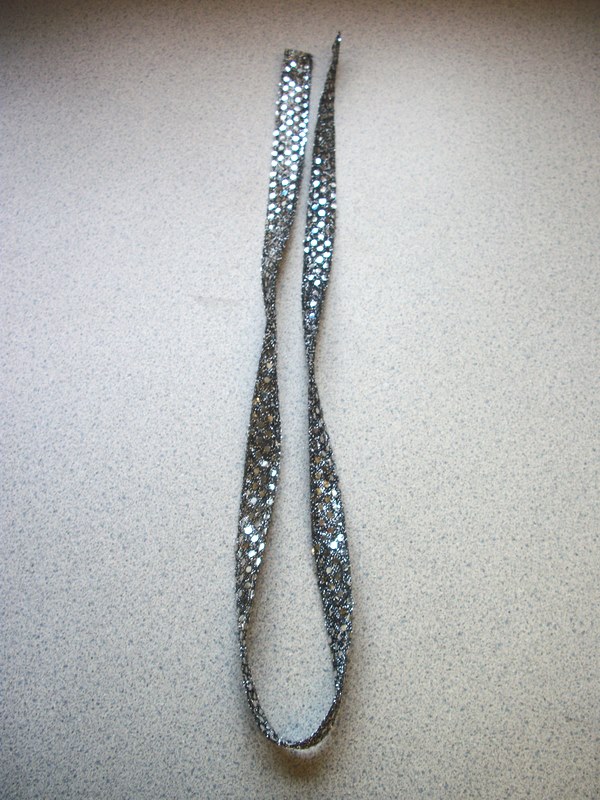
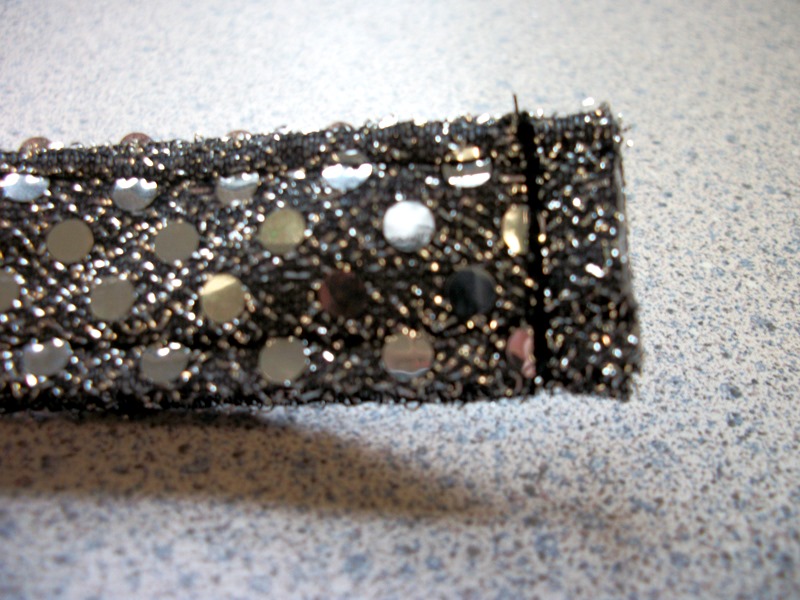
I bought them 10 yards of it just for "extra" projects.  They freaked out when they saw it.  So, we are making lanyards.  Sequin Lanyards.  Glamyards.
Here's How (Yes, these directions are pretty elementary.  I wrote them for 7th graders!):


Materials:
·         Fabric- 3” by 44”
·         Interfacing- 3” by 44” (This is optional.  The fequin fabric I used was super thin, so I used it to stabilize.  You don't need it if you are using cotton unless you want it.
·         Key Ring (or office supply rings.  This is public school, folks!)

Directions:
1.       Cut your fequin fabric and interfacing to be the same size, 3” by 44”.
2.       Apply interfacing to the fequin fabric with glue dots facing wrong side of fabric.
3.       Fold fabric in half lengthwise, so that is now 1.5” by 44”.  Iron.

4.       Open fabric out so that you now have a crease down the center of the strip.  Fold each edge of the fabric to the center crease.  Iron.
5.       Fold strip back together.

6.       Sew a ¼ inch seam allowance down both sides of the strip.

7.        Fold your strip in half so that is now 22” in length.
8.       Slip the key ring onto the lanyard to that it is in the middle of the strip (Okay, I used book rings I found in the supply closet.  Totally awesome and free!)
9.       Make sure your lanyard it not twisted and pin the two raw edges together.

10.   Sew across the raw edge with a ¼ inch seam allowance several times, backstitching each time.
11.   Trim seam away to 1/8 inch, making sure not to cut into stitches.
12.    Pull ring down to the seam just sewn and center the ring over the seam.

13.   Stitch as close to the ring as possible to secure it in place.  You will need to move your machine needle to the left, as if you were stitching on a zipper.
Done!


I'm not the hugest fan of carrying a lanyard.  However, I like the feeling of twirling my keys around while at school.  I feel like a warden on my cell block.  Ha.

Cost?  Well, 1 yard was $1.47.  You use 3 inches, which is 1/12 of a yard.  1/12 of $1.47 is TWELVE CENTS.  Thread and ring were free.  Woop Woop!
designed with love by beautiful dawn designs