You know what I love the most? You can wash the wall. Who ever heard of that?! I love it! No more scrapes I have to worry about or little sticky fingers (in the future of course! Although I did have a dream last night that I gave birth to a chicken cutlet. Literally. What. the. heck.) I love love love the contrast of the white with the taupe wall. My husband is awesome. I love him so much- I mean, really. Marriage and the deep, precious connection you can have with someone is truly a blessing. I go to bed so many nights (we do have off days, people!) thinking, "I can never get enough of this man". Trying to show him that is a different story, but I'm workin on it. One thing I love and respect in my husband is his mind. This man is smart! He did so much math that I forgot how to do since high school and it was no big dill to him. =) Gotta love this face!
 |
| Yummy! Haha. No, but really. |
Anyways, did not realize this, but lamp shades cost cash money. I wanted one for our basement that had a print on it, but I couldn't find one for less than $25. Even then, it wasn't what I wanted. I wanted a drum lamp shade (which tend to be more expensive for some reason) with a bold graphic print, taupe and white, with navy blue- oh, and did I mention cheap? Tall order, sis. Welp, guess I'll make it!
I bought this shade at Target on clearance for $10 (it was originally $19.99!). I changed one of my prescription medications, and I had a coupon for a $10 gift card with a new/transferred script (which is free with insurance. BAM). SO, free lamp shade. I borrowed the paint/tiny paint brush from a gal pal, had the adhesive, and paid $1.44 for the bias tape. SO, this is a $1.44 makeover!
Here is the before and after:
"My goodness, woman! How did you do that?" sayeth my charming husband. Here's how!
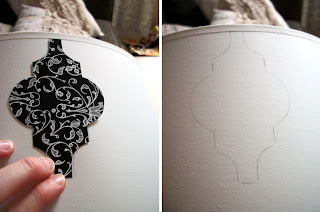
At first, I thought I would do freezer paper stencils. Hello- these things are genius. So, I found my design, cut it out, traced it, cut it out again 5000 times with freezer paper, and ironed 2 stencils on.
Then, disaster. Warped lamp shade!
 |
| Fail. Yes, it does happen to me, a lot actually! |
 |
| I used just regular old craft paint in Greige. Yum. |
I actually really liked it without the trim, but I wasn't so careful around the edges of the lamp because I knew I was going to cover it. When I do this again, I will tape off the edges! I used this magical product (which I already had and paid nothing for because Joann's was having a BOGO sale on the ironing notions wall. Holla!) to stick the bias tape on the edges.
 |
| It's press on! Does not even require an iron. Love. |
I thought about making my own strip of fabric instead of purchasing bias tape, but I knew it would not be perfectly straight and well- do you know me? That's not okay! It was only $1.44. I didn't have any navy fabric anyway!
 |
| See that little flower holder? Gorg, ceramic, and $1 at Salvation Army. |


Wow, SO cute! :)
ReplyDeleteLove your shade! It can be done maybe easier? Not sure butmaybe.
ReplyDelete1. Instead of using wax paper (and ironing) use contact paper next time. The new stuff is easily removable so it will not be a problem to remove it later.
2. If you have an electronic cutter like a Silhouette Cameo or eClips, cut out the design (on contact paper or wax paper) with it instead of the hand cutting.